This tutorial was written with/for Textual 0.24.1.
Introduction
This short tutorial will teach you how to use modal screens in Textual.
A modal screen is a screen that is typically used for a quick interaction with the user before going back to the main application.
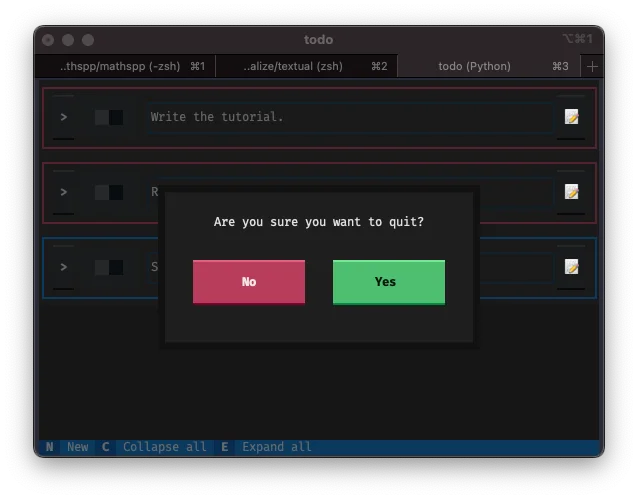
As a quick example, here is my TODO app showing a modal to confirm exiting the app:
Building a modal screen
Inheriting from ModalScreen
The first modal screen we will build is the exit screen from the demo above.
A modal screen needs to inherit from ModalScreen, so that is the first thing we need to do:
from textual.screen import ModalScreen

class ExitScreen(ModalScreen):
    """A modal exit screen."""
Composing the screen
Next, we need to compose the children widgets that we will need in this screen. We need a label and two buttons, so let us yield them:
from textual.app import ComposeResult
from textual.screen import ModalScreen
from textual.widgets import Button, Label

class ExitScreen(ModalScreen):
    """A modal exit screen."""

    def compose(self) -> ComposeResult:
        yield Label("Are you sure you want to quit?")
        yield Button("no")
        yield Button("yes")
Now, in order to be able to see this modal screen, we can whip up a dummy app whose only job is to open this modal screen:
from textual.app import App, ComposeResult
...
class DummyApp(App[None]):
def compose(self) -> ComposeResult:
yield Button("Open modal.")
def on_button_pressed(self) -> None:
self.push_screen(ExitScreen())
app = DummyApp()
if __name__ == "__main__":
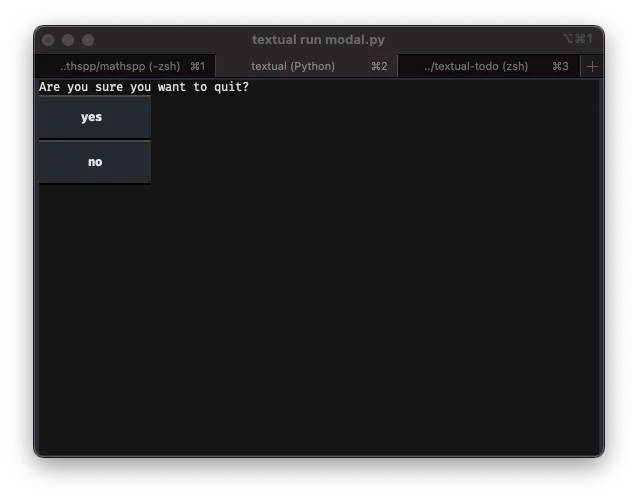
app.run()This already runs, although it doesn't do much:
Wiring up the modal
A modal screen is just like a regular screen in terms of its functioning, so we can wire the buttons in the usual way:
- we will change their variants (to add some styling);
- we will add an ID to each button to be able to distinguish which button was pressed; and
- we will act accordingly to the button pressed:
- if the button pressed was “Yes”, we exit the app; and
- if the button pressed was “No”, we go back to the app.
First, we change the buttons:
...

class ExitScreen(ModalScreen):
    """A modal exit screen."""

    def compose(self) -> ComposeResult:
        yield Label("Are you sure you want to quit?")
        yield Button("No", id="yes", variant="error")
        yield Button("Yes", id="no", variant="success")

...
Now, we can add handlers for each button press.
Using the new @on decorator, this is straightforward:
from textual import on
...

class ExitScreen(ModalScreen):
    ...

    @on(Button.Pressed, "#yes")
    def exit_app(self) -> None:
        self.app.exit()

    @on(Button.Pressed, "#no")
    def back_to_app(self) -> None:
        self.app.pop_screen()

...
Now, our modal screen works although it does not look like a modal screen:
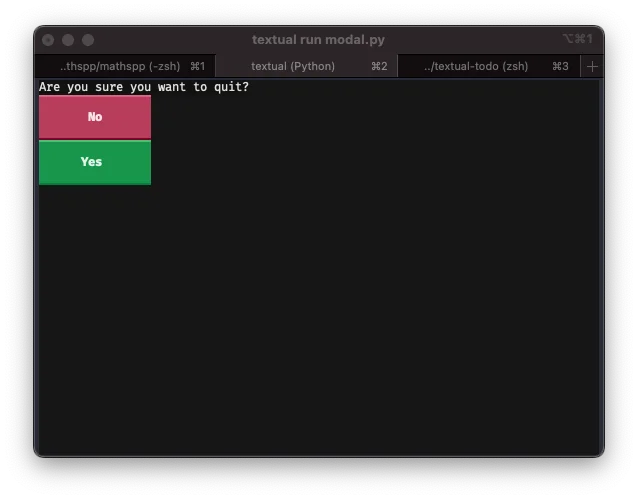
We will style the screen next.
Styling the modal screen
Make it look like a modal
The first thing we will do is make the modal screen look like a modal screen. To do this, we will wrap all the children of the modal screen in a container so that we can align them in the middle of the modal screen.
By making the container have auto dimensions, we will leave “empty” space in the modal's background that will then get the default transparency style to show the screen that is “under” the modal:
...
from textual.containers import Container
class ExitScreen(ModalScreen):
"""A modal exit screen."""
DEFAULT_CSS = """
ExitScreen {
align: center middle;
}
ExitScreen > Container {
width: auto;
height: auto;
}
"""
def compose(self) -> ComposeResult:
with Container():
yield Label("Are you sure you want to quit?")
yield Button("No", id="no", variant="error")
yield Button("Yes", id="yes", variant="success")
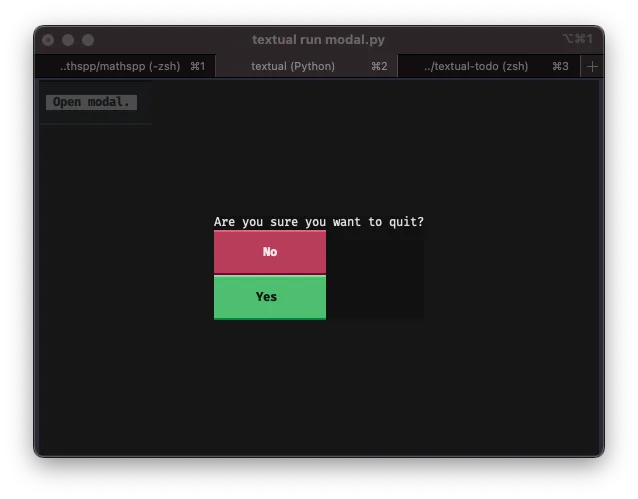
...This is enough to allow us to see the background screen through the modal:
Now, with a horizontal container and some CSS, we can tidy up the modal screen a bit more:
...
from textual.containers import Container, Horizontal

class ExitScreen(ModalScreen):
    """A modal exit screen."""

    DEFAULT_CSS = """
    ExitScreen {
        align: center middle;
    }

    ExitScreen > Container {
        width: auto;
        height: auto;
        border: thick $background 80%;
        background: $surface;
    }

    ExitScreen > Container > Label {
        width: 100%;
        content-align-horizontal: center;
        margin-top: 1;
    }

    ExitScreen > Container > Horizontal {
        width: auto;
        height: auto;
    }

    ExitScreen > Container > Horizontal > Button {
        margin: 2 4;
    }
    """

    def compose(self) -> ComposeResult:
        with Container():
            yield Label("Are you sure you want to quit?")
            with Horizontal():
                yield Button("No", id="no", variant="error")
                yield Button("Yes", id="yes", variant="success")

...
This creates a modal screen that looks like this:

This already looks quite good!
Styling tip
When you are writing CSS for your apps, screens, components, etc, my suggestion is that you always use the live editing features of Textual.
In the above, I just added the CSS into the attribute DEFAULT_CSS because I already knew what CSS I wanted to add.
Getting a result from a modal
Creating the modal
Now that we have seen how to create a modal, I will show you how to get a result back from the modal. For example, if your modal asks for some user input, how can you get that input back?
Like applications, screens are generics and can be typed with the type of their result. If we are creating a modal that asks for user input, our modal will return a string:
class InputModal(ModalScreen[str]):
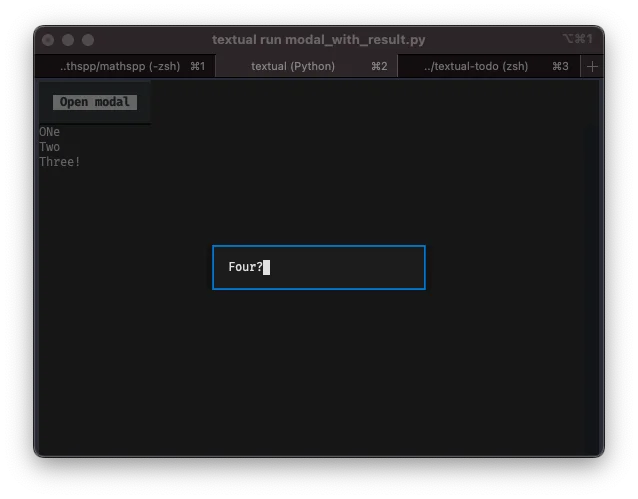
...This is what our input modal will look like:
from textual.containers import Container
from textual.screen import ModalScreen
from textual.widgets import Input

class InputModal(ModalScreen[str]):
    DEFAULT_CSS = """
    InputModal {
        align: center middle;
    }

    InputModal > Container {
        width: auto;
        height: auto;
    }

    InputModal > Container > Input {
        width: 32;
    }
    """

    def compose(self) -> ComposeResult:
        with Container():
            yield Input()
Now, we create a dummy app that fires up the modal screen:
from textual.app import App, ComposeResult
from textual.containers import Container
from textual.screen import ModalScreen
from textual.widgets import Button, Input, TextLog

class InputModal(ModalScreen[str]):
    ...

class DummyApp(App[None]):
    CSS = """
    TextLog {
        height: 1fr;
    }
    """

    def compose(self) -> ComposeResult:
        yield Button("Open modal")
        yield TextLog()

    def on_button_pressed(self) -> None:
        self.push_screen(InputModal())

app = DummyApp()
if __name__ == "__main__":
    app.run()
Now we can answer the question: how can we get the input value back?
Dismissing a modal with a result
To get a result out of a modal screen, we need to call the method dismiss with the result as an argument.
We want to do this when the input is submitted, so we can do it in an event handler:
class InputModal(ModalScreen[str]):
    ...

    def on_input_submitted(self) -> None:
        #    vvvvvvv dismiss the modal screen;
        self.dismiss(self.query_one(Input).value)
        # with this  ^^^^^^^^^^^^^^^^^^^^^^^^^^^ result value.
Try your app at this point. Open the model, writing something, and then press Enter. This will close your modal screen but it won't do anything with the result.
Handling a modal result with a callback
To handle the result of the modal screen, we need to pass a callback when we push the modal screen in the first place. For our dummy app, let us write the input value to the text log, so we can write a callback that accepts the result string and writes it:
class DummyApp(App[None]):
    ...

    def on_button_pressed(self) -> None:
        # Note the extra argument here vvvvvvvvvvvvvvvvvvvvvvvvv
        self.push_screen(InputModal(), self.input_modal_callback)

    def input_modal_callback(self, result: str) -> None:
        """Handle the modal result by writing it to the TextLog."""
        self.query_one(TextLog).write(result)
Alternatively, we could have passed the write method of the TextLog directly to the push_screen method:
class DummyApp(App[None]):
    ...

    def on_button_pressed(self) -> None:
        self.push_screen(InputModal(), self.query_one(TextLog).write)
If you open your app, open the modal, write something, and then press Enter, what you wrote should end up in the text log! You can do this as many times as you want:
Conclusion
This short tutorial showed you how to use modal screens, how to create them and dismiss them, and how to get results back into the app.
If you have any questions, feel free to join the Textual Discord server where you will find many people that are willing to help! As usual, you can also just leave a comment below!
See you around.
This tutorial was written with/for Textual 0.24.1.
Become the smartest Python 🐍 developer in the room 🚀
Every Monday, you'll get a Python deep dive that unpacks a topic with analogies, diagrams, and code examples so you can write clearer, faster, and more idiomatic code.
References
- Textual Screen API, https://textual.textualize.io/api/screen/ [last accessed 10-05-2023];